The marking of Scheme (schema markup in English) is a tool used to improve the SEO of any website. However, many companies don't make the most of it in their projects created in Webflow. Implementing it correctly can make a difference in positioning and in how Google interprets or displays your business information.
For any Webflow agency, mastering the use of the schema is key to offering optimized websites ready to stand out on Google. For example, an agency can take advantage of advanced schemes to automate the generation of rich snippets in blogs, improve product visibility in Google Shopping, or better structure information about events and services, increasing the relevance of the web in searches.
In this article I explain what the schema is, why it is important and how to add it to Webflow in different scenarios: all over the web, on a specific page and on pages generated with CMS.
What is a schema and why is it important?
El Scheme (also known as structured data) is a code that can be inserted in JSON-LD, microdata and RDFa formats; it helps search engines to better understand the content of a page. Thanks to this, rich results can be displayed on Google, such as:
- Review stars
- Product Information
- Events
- Business data (address, hours, telephone number, etc.)
Implementing the schema improves visibility in search results and can increase CTR (Click-Through Rate).
How to add a schema in Webflow
We will use the JSON-LD format, since it is the most friendly to Webflow and the one that works best on this technology.
1. Add schema across the web
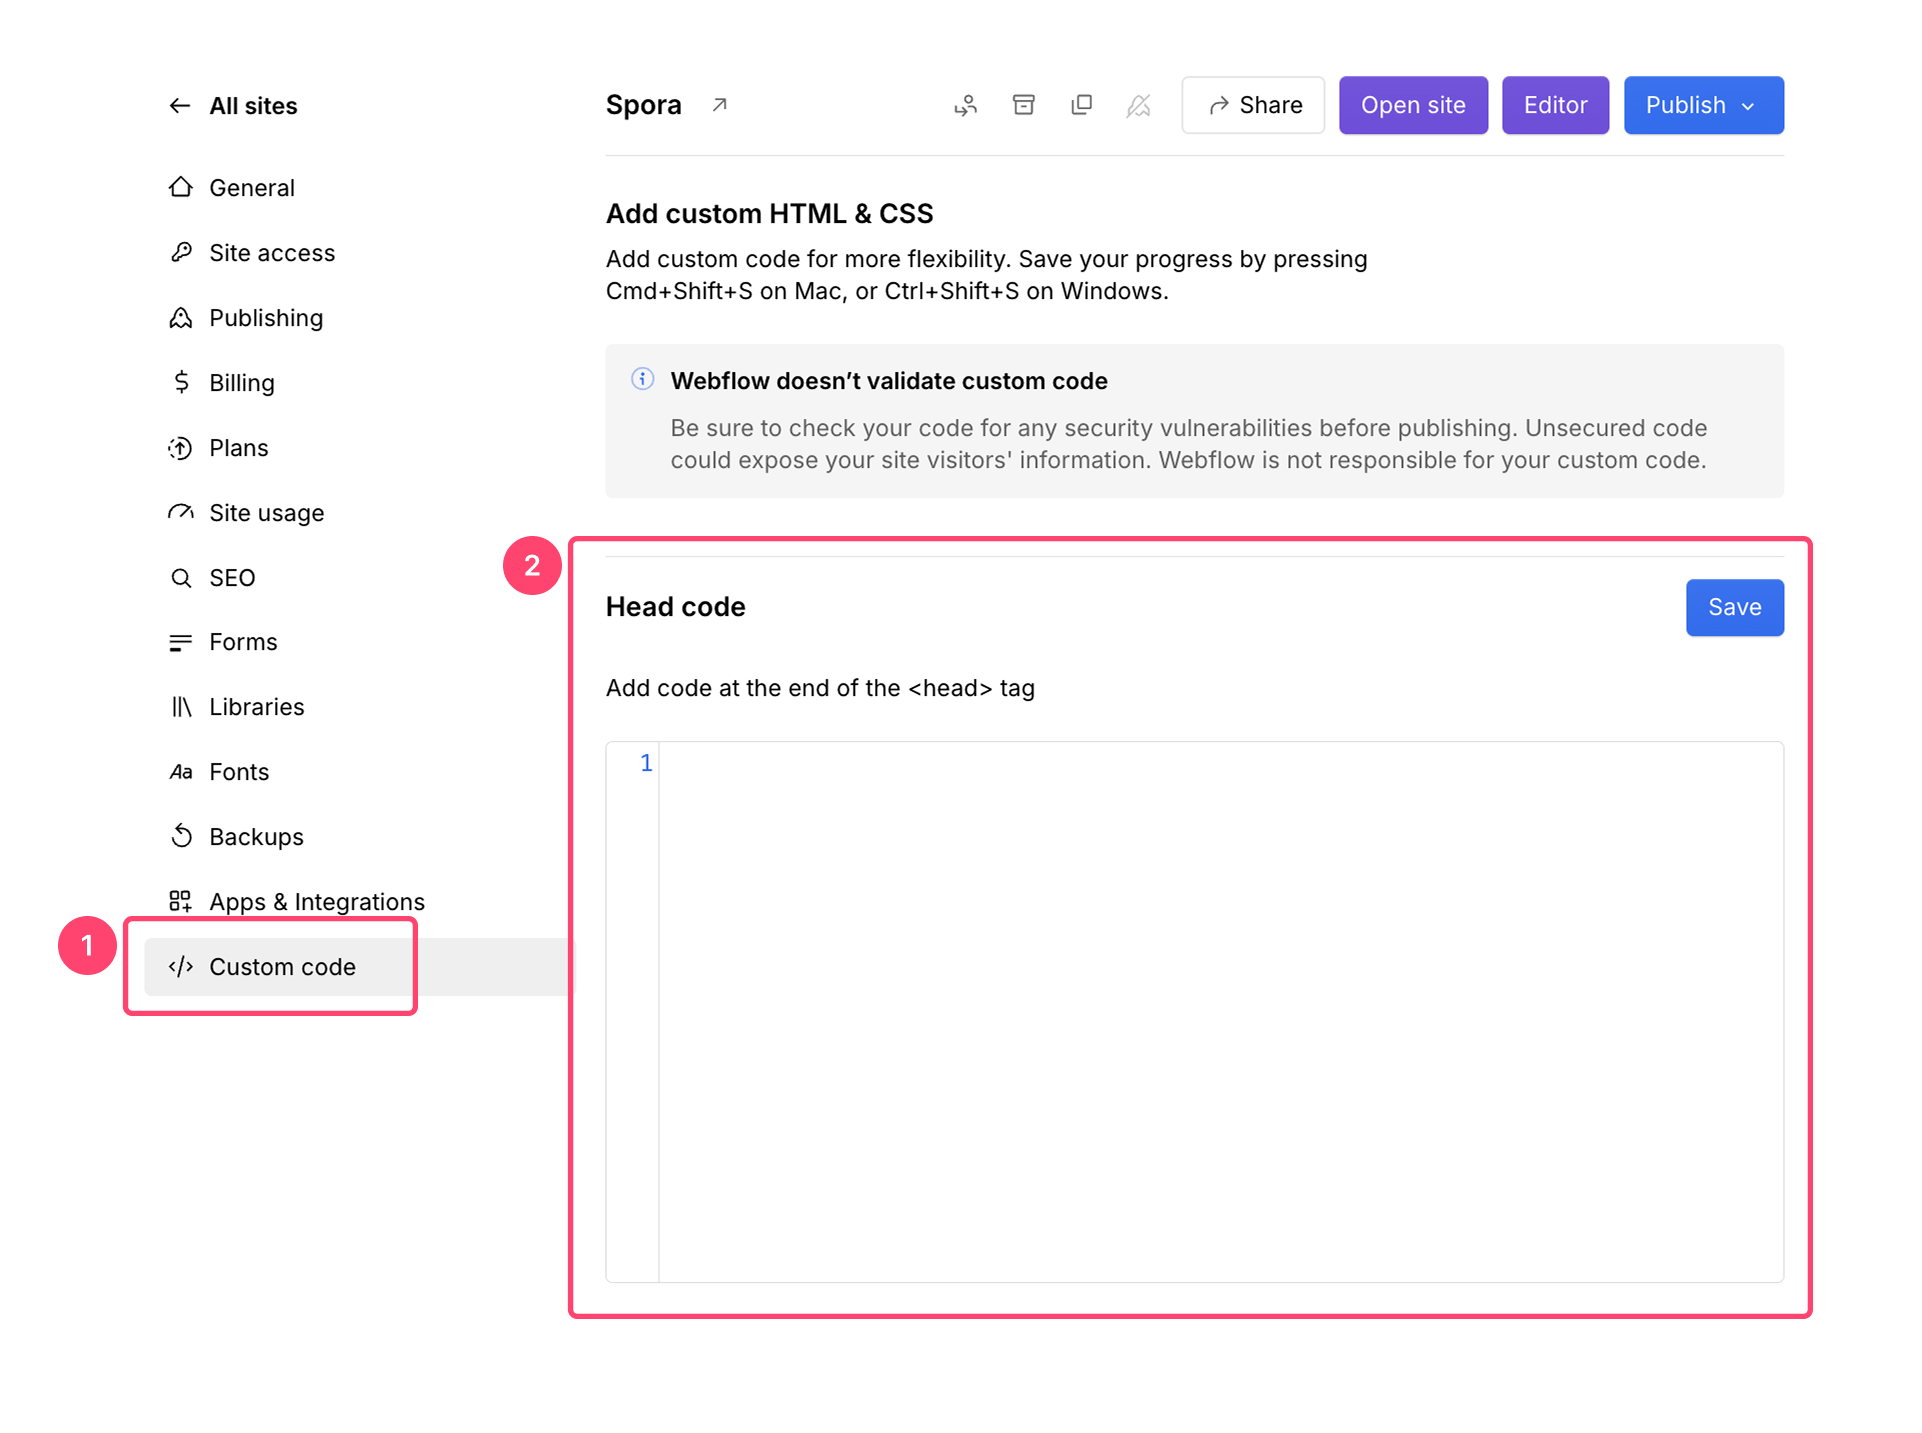
If the schema applies to the entire site (for example, a local company or organization schema), it's best to add it to the Custom code from Webflow.
Steps:
- Go to Project Settings.
- Go to the tab Custom Code.
- In the section Head Code, insert the JSON-LD code.
- Save the changes and publish the website.
Example of JSON-LD code for a company
<script type="application/ld+json">
{
  "@context": "https://schema.org",
  "@type": "Organization",
  "name": "Nombre de la Agencia",
  "url": "https://tuagencia.com",
  "logo": "https://tuagencia.com/logo.png",
  "contactPoint": {
    "@type": "ContactPoint",
    "telephone": "+34 123 456 789",
    "contactType": "customer service"
  }
}
</script>
2. Add schema on a specific page
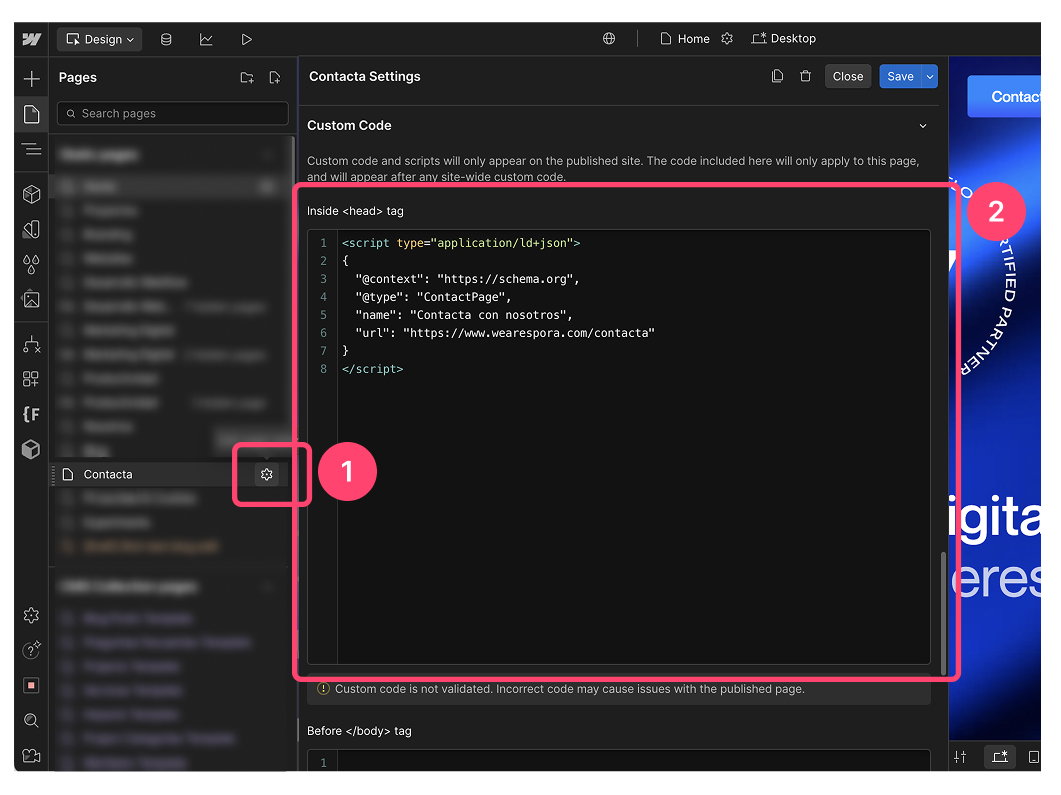
For cases where the schema should only apply to a particular page (such as a product page or landing page), the code is inserted directly into the configuration of that page.
Steps:
- Go to Pages in Webflow.
- Select the page where you want to add the schema.
- Click the settings icon ⚙️.
- In the section Custom Code, within Before
</body>Tag, paste the JSON-LD code. - Save the changes and publish the website.
Example of a schema for a contact page
<script type="application/ld+json">
{
  "@context": "https://schema.org",
  "@type": "ContactPage",
  "name": "Contacto",
  "url": "https://tuagencia.com/contacto"
}
</script>
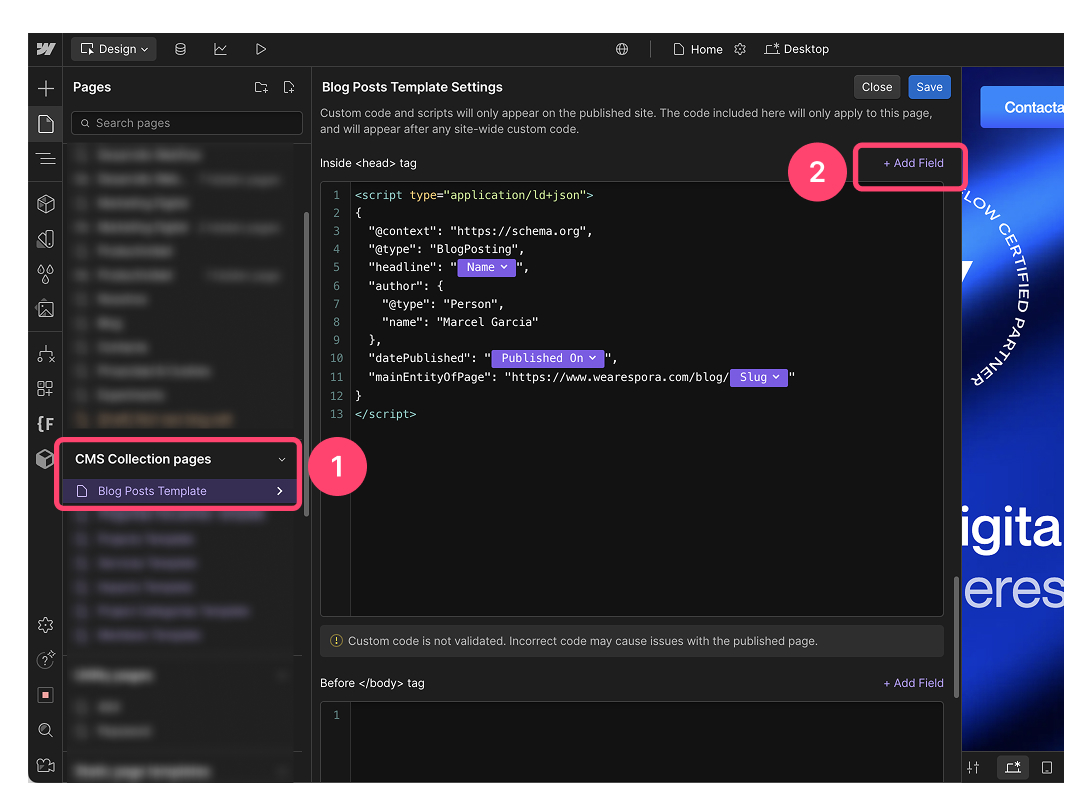
3. Add schema to CMS (dynamic) pages
When using pages generated with CMS (such as a blog or product listings), it is possible to insert a dynamic schema based on the fields in the collection.
Steps:
- Go to Pages and select the template from the collection (CMS Template).
- Go to Page Settings (⚙️).
- In the section Custom Code, add the following code inside </body>Before tag.
- Use the dynamic fields from Webflow to customize the schema
Example of a schema for a blog with dynamic fields:
<script type="application/ld+json">
{
  "@context": "https://schema.org",
  "@type": "BlogPosting",
  "headline": "{{Nombre del post}}",
  "author": {
    "@type": "Person",
    "name": "{{Nombre del autor}}"
  },
  "datePublished": "{{Fecha de publicación}}",
  "mainEntityOfPage": "{{URL del post}}"
}
</script>
Verifying that the schema works
Once the schema has been added, it's important to verify that Google recognizes it correctly. To do this, you can use two free Google tools:
- Rich Results Test (https://search.google.com/test/rich-results)
- Markup Validator Schema (https://validator.schema.org/)
Just enter the URL and check if the schema is detected correctly. If it doesn't appear or show errors, review the code to make sure it's well-structured and free of incorrect characters. You can also try another validation tool or make adjustments to the implementation.